
Curved XPS Backer Board
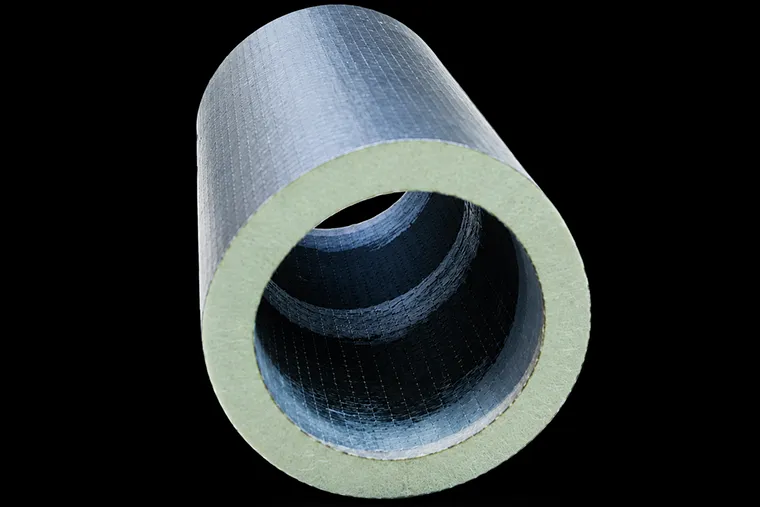
The board that arrives flat and leaves curved. We kerf-cut V-notches into the back face at the spacing your radius demands, so the panel rolls into columns, radius walls and curved shower enclosures on site. Coated face takes tile directly. Custom radius, cut to your drawings.
| Core: | High-density XPS, coated |
| Bend: | Kerf-cut to radius, ships flat |
| Surface: | Ready for thin-set tile |
| Sizes: | Custom, 4-50 mm range |
Overview
Tiling a curved wall with flat boards means one of two bad options: a polygon of small cuts with a joint every few centimetres, or a wet trade forming the curve in mortar and hoping it stays. Both cost days. There is a third option, and the photo above is the proof: a rigid board, rolled into a perfect cylinder.
The trick is not bending the board. It is cutting it. We mill evenly spaced V-notches into the back face, turning one rigid panel into a row of segments hinged by the coated face. The panel ships flat, and on site it rolls into the curve the way a folding rule opens — the tighter your radius, the closer we space the kerfs. The coated face is never touched, and the core is never stressed, so the numbers stay the numbers: 0.8% water absorption over 96 hours, batch-tested production, the same board as the rest of the system with geometry added.
Once the panel is rolled and fixed, every kerf becomes a joint, and every joint is treated the way this system always treats joints: elastic sealant, mesh tape, flood test before tiling. The kerfs disappear under the finish, and the curve they created holds its line for the life of the tile.
One honest boundary: a kerf-cut panel has a minimum practical radius, set by thickness and kerf spacing, and below it the honest answer is a segmented build. Send the drawing and we say which side of the line your wall falls on — before the order, not after the tile.
Applications
Curved shower enclosures and wet room walls
Columns and radius partitions
Spa and wellness rooms with organic layouts
Display and retail fit-outs with curved tiling
Fixing
Roll the kerf-cut panel into position against the frame and check the radius against the drawing before fixing anything — the first panel is the template for the rest. Fix with screws and washers, then treat every kerf as a joint: elastic sealant bedded with mesh tape. Flood test with the rest of the room, then tile straight onto the coated face. The full sequence is in our installation guide, free with a sample request.
Complete the System
One material system, one fixing pattern — these usually ship together.